
Merge tags are a great tool to personalize and customize your email campaigns. In the content of this article, you’ll learn the meaning of Mailchimp merge tags and how to use them to improve the quality of your campaigns.
What are merge tags?
A merge tag is a text identifier that matches the unique data saved in an audience field.
An audience field is specific contact information stored in your audience, such as name, email address and all sorts of personalized data you wish to add. It's also where you can view additional information about your contacts, such as tags and groups.
Setting up merge tags will allow you to customize email campaigns with information stored in your audience.
How merge tags work
To enable merge tags, all audience fields must be completed with your contact’s information. For example, let's say you want to send a campaign where the opening text starts with each of the recipient’s first name.
Standard merge tag for "Name" is *|FNAME|*.
To do so, you would place the *|FNAME|* merge tag where you want the contact’s first name to appear. When your users receive the campaign, each user will start reading the email by their own name.
When you insert a merge tag into your email campaign, the tag will be replaced with the content stored in that specific audience field.
You can customize your campaigns with all types of merge tags. From email subject and footer lines to campaign related content, merge tags let you personalize your campaigns to another level.
Adding merge tags to your campaign
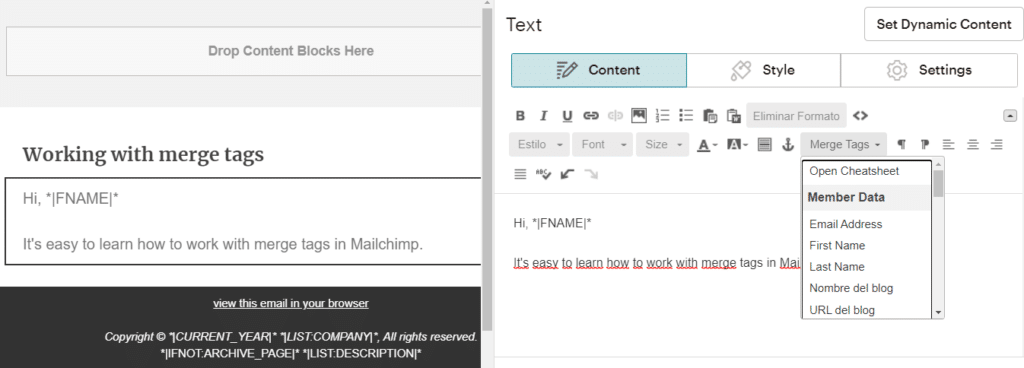
You can add a merge tag directly into your content by clicking Merge Tags on the menu above the text editing box. You’ll get a dropdown menu of all the merge tags available.
A merge tag can also be added by typing it directly into your content. If you type a merge tag, make sure to place the merge tag between the asterisk sign (*) and pipe (|) characters. It should be typed like this:
*|FNAME|*
If mistyped, the merge tag won’t be displayed properly and your contacts will get a typo instead.
Types of merge tags
Audience merge tags are linked to the contact data stored in your audience. When you include them in your campaigns, Mailchimp will use the most recent data from your audience.
These are some of the most common types of merge tags in Mailchimp:
*|FNAME|*
Displays the name of each contact in your audience.
*|LIST:RECENT|*
Shows the 5 most recent campaigns you have sent to that same audience. You can use the *|LIST:RECENTX|* merge tag and replace the X with the number of campaigns you want your audience to see. It’s set in 5 by default.
*|LIST:SUBSCRIBE|*
Displays the URL for your previously customized audience's subscribe form. A subscription form, whether single opt-in or double opt-in, is one of the best ways to make your audience gain more subscribers.
*|EMAIL|*
Displays your contact's email address.
*|LIST:COMPANY|*
Shows the name of your company or organization. By default it’s a required email footer merge tag.
You can see the full merge tag reference list in this link.
How to customize merge tags
To quickly customize and edit merge tags, follow these simple steps:
- Go to Audience and click Settings.
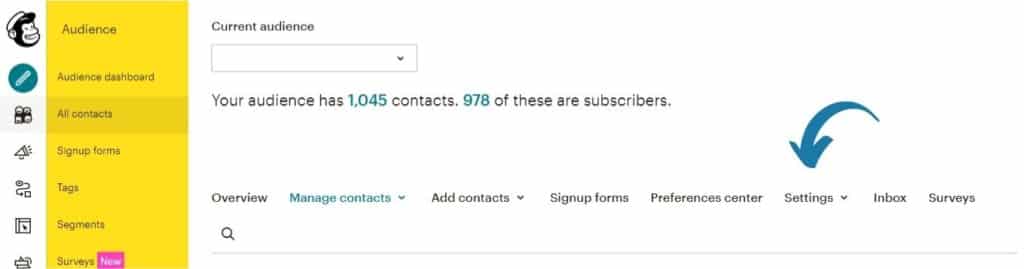
2. In the dropdown menu, click Audience fields and *|MERGE|* tags.

There you can edit the custom merge tags and assign one merge tag to all the field labels in your audience and choose which merge tags are required or visible.

In this same menu, you can also add personalized fields to your audience. If you want to add a customized one, click Text.
Otherwise, choose from the available fields. The, click Save Changes.

Be extra careful if you rename audience merge tags. The custom made merge tags used by Mailchimp are unique and reserved for certain field names that can’t be reused (like the examples listed above). Therefore, it’s recommended to use very descriptive and specific names.
Pro tip: Using conditional merge tags
Conditional merge tags help you show unique content to a specific segment of your audience. It can assist you in personalizing email content in countless ways.
You can build conditional merge tags using a language very similar to programming. Besides the traditional IF statements (IF, ELSE, ELSEIF, and IFNOT), Mailchimp supports the next characters:
= equal to
!= not equal to
> greater than
< less than
>= greater than or equal to
<= less than or equal to
Let’s say that your audience is international and you use both English and Spanish in your campaigns.
A conditional merge tag can help you display content in both languages based on your contact’s profile information. To do that, you would add the following content:
*|IF:MC_LANGUAGE=es|*
Place content in Spanish here. (It will be displayed only to subscribers whose language is set to Spanish).
*|ELSE:|*
Display content in English here. (It will be displayed for everyone else).
*|END:IF|*
Conditional merge tags are also very useful for displaying certain content in place of missing data.
Let’s say that you want to use the *|FNAME|* merge tag, but some email addresses in your audience don’t have that value added yet.
That specific conditional merge tag would look like this:
Dear *|IF:FNAME|*
*|FNAME|*,
*|ELSE:|*
Dear customer,
*|END:IF|*
Conditional merge tags can be useful in many cases, whether for instance you want to display content based on age or to show certain content to different groups in your audience.
Get help from Mailchimp experts
Duckduckchimp is the Mailchimp Agency that will take your business to next level, helping you refine your email marketing approach.
No Comments.