When you’re launching a marketing campaign, you want to capture the biggest attention possible and in that sense, social media is a powerful ally. Using the Mailchimp ad builder will help you create Facebook and Instagram ads directly from your Mailchimp account.
Compared to Facebook’s Ads Manager, Mailchimp features a straightforward approach to creating native ads from its own platform. In no time, you’ll learn how to target Facebook and Instagram users, find new customers, reach your own audience and even retarget your site visitors.
After you’re done with this article, you’ll be able to create Facebook and Instagram ads with Mailchimp.
How do I create ads in Mailchimp?
Before you start creating Facebook and Instagram ads, you must connect your Facebook page to Mailchimp. (You must be Admin of the Facebook Page you want to connect).
Also, keep in mind that in order to run ads on Instagram, your Instagram business profile must be connected to your Facebook Page.
Follow the next steps to create a Facebook and Instagram ads with Mailchimp.
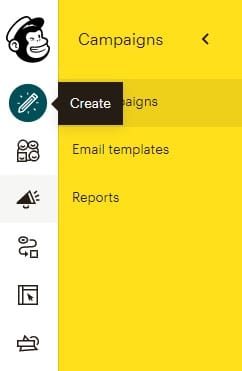
- Click the Create icon on the left sidebar.
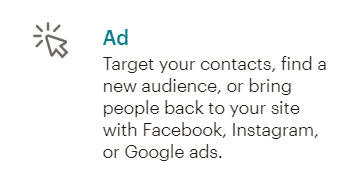
- Select and click Ad.
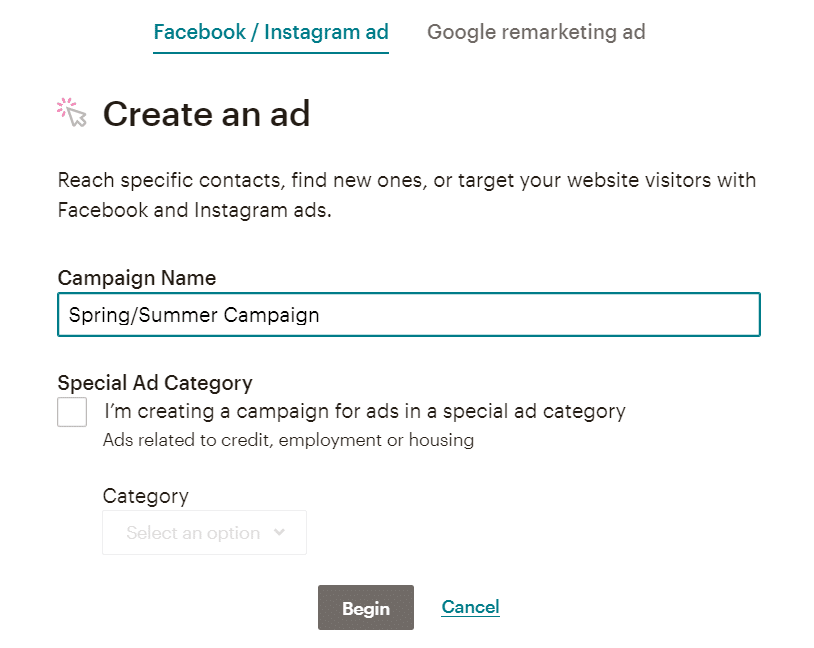
- Choose a name for your campaign and click Begin. If your campaign is related to housing, credit or employment, check the Special Ad Category Box and select the matching option.
- Welcome to the ad builder! If you’re not logged in to Facebook, enter your credentials and you’ll be set to start creating your ad.
- Choose the Facebook Page you want to run your ad.
- Toggle the sliders to select the social media channel for your ad: Facebook, Instagram or both.
- Click the Edit button to choose where your ad will be placed (News Feed, Audience Network or both).

- Click Save.
Edit your ad’s audience
This next step will guide you through the process of selecting your target audience.
You can select an entire audience, a segment of contacts or customize a group of people according to specific settings. Let’s take a closer look at the Mailchimp options for editing audiences.

New people
Select “New people” to show your ad to an audience similar to your existing contacts. Choose an audience and decide if you want to use all your contacts, tags or your own segments or groups.
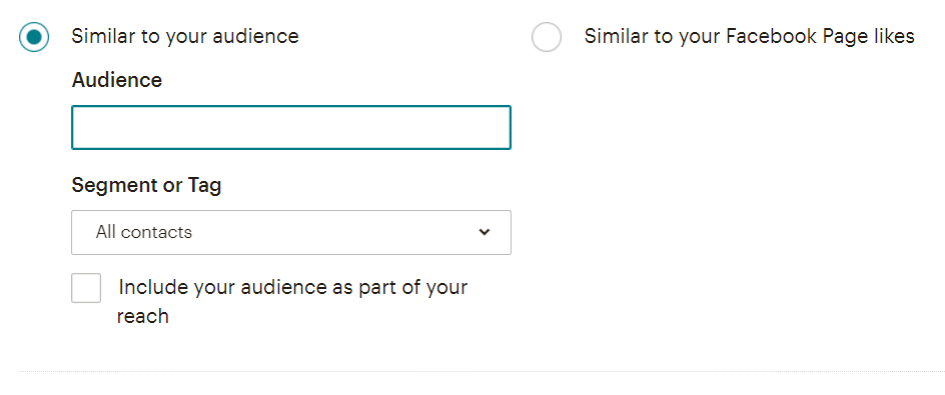
This is a recommended option as your main interest with the ad is to expand your brand’s exposure and get more subscribers. You can also choose to show your ad to people similar to your Facebook Page likes.
Pro tip: You can even reconnect with people who opted out of your mailing list by choosing to display your ad to your unsubscribed contacts.
Contacts
Use this option if you want to show the ad to an audience, a segment of contacts or to those profiles who liked your Facebook Page.
Custom audience
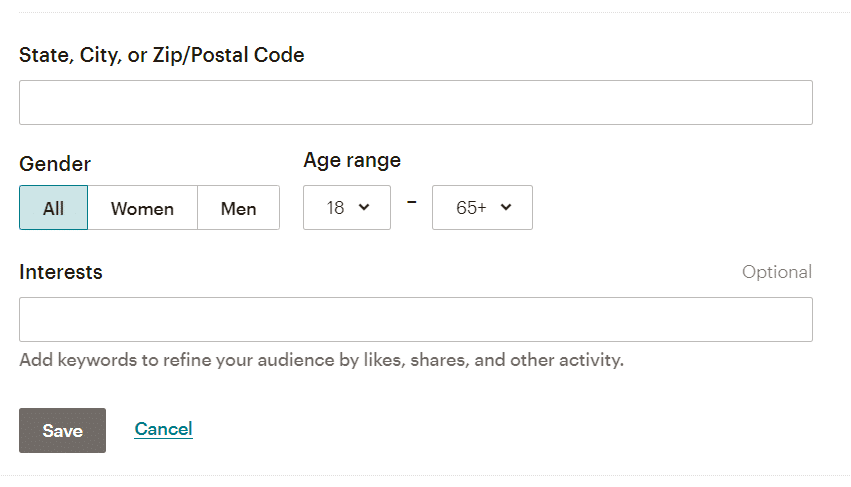
You can create a custom audience according to geographic location, gender and age range. Additionally, you can add interests if you want to customize the ad’s audience even further.
Website visitors
Finally, the website visitors option will show your ad to people who have already visited your website when they’re scrolling through Facebook, Instagram or Facebook’s Audience Network.
This can be done using retargeting ads, (a feature we will explain further in this article). You can use this option to target website or landing page visitors and turn them into potential customers.
Pro tip: Your ad can be rejected if your audience size is too small or if it doesn’t comply with Facebook’s ad policies. If it’s rejected by Facebook, you’ll be credited with the budget surplus, so you can re-edit your ad or spend it on a new one.
To target your own contacts, the minimum size of your audience must be at least 100 contacts. If you choose to target people similar to your audience, your audience must have a minimum of 500 contacts.
Set the budget
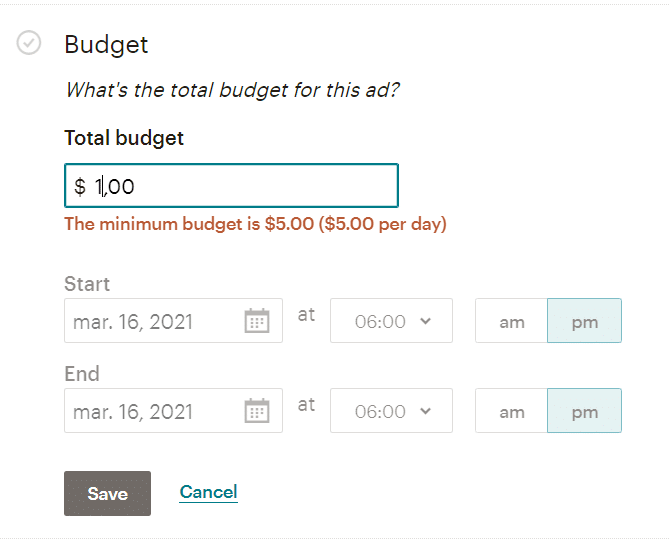
Set the desired budget (the minimum is $5.00 per day). For longer periods, you can set the start and end dates and time.
A Mailchimp ad is always purchased upfront and you’ll never be charged anything extra than the final budget you set in the ad builder.
Designing your Mailchimp ad
The final and most entertaining step in the Mailchimp ad builder is designing your ad. Be playful and creative!
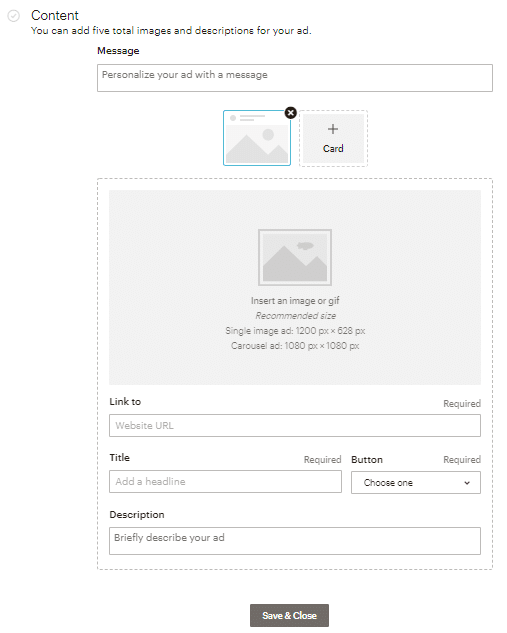
- Start by typing a personalized message.
- Continue adding a GIF or up to 5 images.
- GIF files should have a maximum size of 8MB and 15 seconds or less in length.
- Image dimensions for Facebook should be no less than 1200 x 628 px, a maximum file size of 10 MB and an aspect ratio between 1.91:1 and 9:16.
- For Instagram, the dimensions should be at least 600 x 600 px, a maximum file size of 10 MB and an aspect ratio between 4:5 to 1.9:1.
- Next you must type the URL of your website you want viewers to visit when they click your ad. (Do not redirect to a Facebook Page as they’re not admitted).
- Type a title for your ad and a call-to-action button.
- Finally, type the text copy you want to accompany your ad in the Description field.
- Click Save & Close, and you’re good to go! Be sure to review its content as you won’t be able to edit the ad once it’s published.
Facebook ad confirmation
In the final step, you’ll be asked to submit your ad by confirming your billing information. After it’s been confirmed and reviewed by Facebook, your ad is ready to appear on social media.
Remember that as with every Mailchimp campaign or landing page, you can check your ad’s performance on the Reports page and analyze key statistics.
It takes approximately 24 hours (after the ad starts running) for Mailchimp to generate a report.
Pausing or canceling a Mailchimp ad
If for any reason you wish to stop your ad from showing on social media, you can pause it or cancel it.
To do so, search the All Campaigns icon and click the drop-down menu next to the ad. There you can choose to Pause (and resume when you want to restart it) or click End to cancel the ad.
How to extend a Mailchimp ad in Facebook or Instagram
If your ad has performed well, you can choose to extend its runtime or reach. In order to extend it, you must wait at least 3 days before its runtime ends. Follow these steps to extend a Mailchimp ad.
- Search and click the “All Campaigns” icon.
- Locate your published ad and click Edit.
- Click Increase budget on the Budget section.
- Then you can choose the budget increase ($5.00 minimum).
- Select how long you wish to extend your ad. (If you select “Don’t extend”, the ad’s duration won’t be extended but it will be more frequently displayed).
- Click Confirm.
Facebook and Instagram Retargeting Ads
A known fact is that a large percentage of the people that visit your website for the first time, will leave without buying your product or service.
Retargeting ads track Facebook and Instagram users that visit your website, in order to show them your ad when they return to check their social media.
This feature takes more time and effort compared to regular ads. This is due to the fact that your store or landing page must have the Facebook ad pixel enabled.
After publishing a retargeting ad, Facebook demands an audience of at least 1,000 website visitors during the next 30 days.
Retargeting ads are a cost-effective way to help tip the scale in your favor by targeting potential customers who arrived at your website, reminding them about your brand, special events or sales.
Bear in mind that this is a paid feature and it’s not available for the Free and Essentials Mailchimp Plans.
Advantages of Mailchimp ads
We can conclude that Mailchimp ads for Facebook and Instagram have several benefits:
- They are extremely easy to use thanks to its user-friendly interface.
- You can target your own mailing list and create ads targeted for similar audiences.
- If you manage several Facebook Pages, you can easily switch between them and run ads to any audience in your account.
- Having complete control over your budget with no extra charges.
- The possibility to reconnect with unsubscribed contacts.
- Pausing or canceling ads with great ease.
Who are we?
We're Duckduckchimp, a Mailchimp Agency that will help you figure out the right approach for your marketing needs.

No Comments.